Easy DIY Crochet Froggy Earmuffs: Free Beginner Pattern
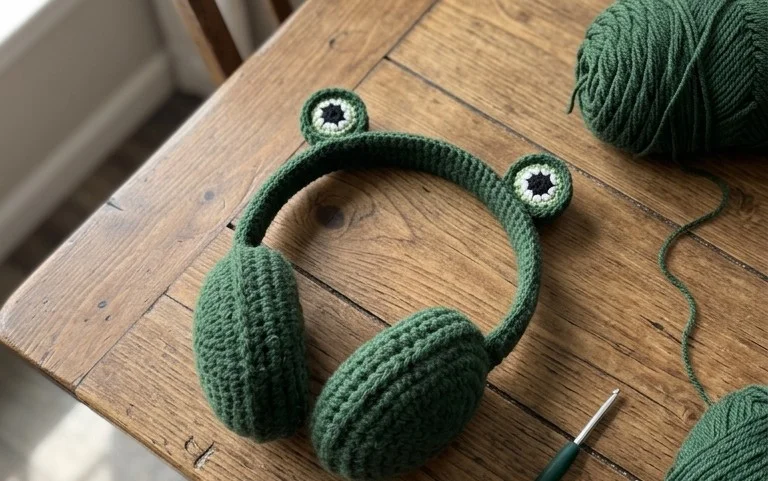
These chunky crochet earmuffs feature oversized frog eyes that sit comfortably over the ears, bringing a playful and cozy charm to your winter wardrobe. The soft cotton construction creates a dense, wind-resistant fabric that feels substantial against the skin, making them a reliable choice for cold morning walks or long commutes. Beginners will appreciate how the circular base quickly transforms into a recognizable shape, building confidence with every round. You will gain mastery over consistent tension and the magic ring technique while building a functional accessory that makes a thoughtful gift for friends who love quirky, handmade style.
Why Crocheters Love It
This beginner-friendly project works up quickly, making it a satisfying choice for those who need a gift in an afternoon or a relaxing weekend make. Because it uses less than one skein of yarn, it is an ideal way to use up those leftover bits from your stash. The construction relies on simple single crochet stitches, which provides a clean, dense fabric that holds its shape well over time. Once you master the basic rhythm of the rounds, you will find it is a project you can easily work on while listening to an audiobook or catching up on your favorite show.
I managed to finish this project in just one evening. The instructions were easy to follow and my finished piece looks just like the photo.
— Sarah, hobbyist crocheter
Pattern Overview & Skill Level
- Skill Level: Beginner
- Approximate Time: 2 to 3 hours
- Construction: Amigurumi-style continuous rounds, worked from the base upwards
- Finished Dimensions: 4 inches tall by 3 inches wide
Materials & Supplies Needed
- Yarn: Worsted weight (#4), 100% cotton yarn, approximately 40 yards. Cotton is preferred for its stitch definition and durability.
- Hook Size: 4.0 mm (G-6) crochet hook.
- Notions: Tapestry needle, stitch markers, polyester fiberfill stuffing, and a pair of 8mm safety eyes.
- Safe yarn substitutions: Acrylic yarn is a suitable alternative for a softer feel, though it may result in a slightly larger finished size due to differences in tension and fiber stretch.
Stitch Guide & Abbreviations (US Terms)
- MR: Magic ring
- ch: Chain
- sc: Single crochet
- inc: Increase (work 2 sc in the same stitch)
- dec: Decrease (sc2tog, working in the front loops only)
- sl st: Slip stitch
- st(s): Stitch(es)
Special Stitch Notes
The decrease (dec) is performed as an invisible decrease: insert your hook into the front loop of the first stitch, then immediately into the front loop of the second stitch. Yarn over and pull through both front loops, then yarn over and pull through the remaining two loops on the hook. This method prevents gaps in your work.
Step-by-Step Pattern Instructions
Body
- Rnd 1: Start 6 sc in a MR (6 sts)
- Rnd 2: Inc in each st around (12 sts)
- Rnd 3: 1 sc, inc repeat around (18 sts)
- Rnd 4: 2 sc, inc repeat around (24 sts)
- Rnd 5-10: Sc in each st around (24 sts)
- Rnd 11: 2 sc, dec repeat around (18 sts)
- Insert safety eyes between rows 7 and 8, spaced 3 stitches apart. Begin adding fiberfill stuffing.
- Rnd 12: 1 sc, dec repeat around (12 sts)
- Rnd 13: Dec around (6 sts)
Finishing
Cut the yarn, leaving a 6-inch tail. Thread the tail through a tapestry needle and weave it through the front loops of the final 6 stitches. Pull the tail tight to close the opening securely. Secure the yarn with a knot and bury the remaining end inside the body of the project.
Care & Washing Instructions
- Hand wash in cool water using a mild detergent to prevent the fiberfill from clumping.
- Gently squeeze out excess water, then lay flat on a clean towel to air dry completely.
- If the item loses its shape after drying, roll it gently between your palms to redistribute the stuffing.
Pro Tips & Common Mistakes to Avoid
Maintain consistent tension throughout your rounds. If your stitches are too loose, the fiberfill will poke through the gaps. To keep your work organized, always place a stitch marker in the first stitch of every round. This prevents you from losing your place when working in a continuous spiral. Weaving in your ends at the very start of the magic ring is necessary to ensure the center does not pull open over time. If you choose to increase the size of the project by adding more rounds at the beginning, remember that you will need more than one skein of yarn to complete the body.
Frequently Asked Questions
Can I use a larger hook size for this pattern?
Yes, you can use a larger hook, but keep in mind that this will create larger gaps between your stitches and result in a bigger finished piece that requires more stuffing.
Is this project suitable for a complete beginner?
This pattern is ideal for beginners as it only requires knowledge of basic single crochet stitches and how to work in the round.
How do I substitute the safety eyes if I do not have them?
You can use black embroidery floss or a scrap of dark yarn to stitch small X shapes or French knots where the eyes would normally be placed.
Am I allowed to sell items made from this pattern?
You are welcome to sell finished items created from this pattern, provided you credit the design and use your own photographs for your listings.
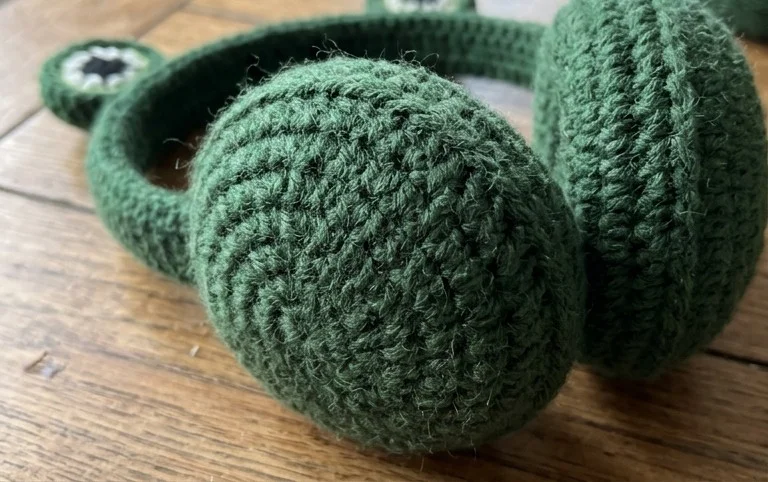
Your new froggy accessories offer a cozy way to keep your ears warm during chilly weather while showing off your handmade work. You might consider using a fuzzy mohair blend instead of cotton if you want a softer, more whimsical texture that mimics a real forest creature. I love seeing how your unique projects turn out, so please share a photo of your finished earmuffs online to help inspire other makers in our community. Please take a look at the rest of my blog for more simple, step-by-step winter accessory projects.